Online shoppers expect an easy and seamless shopping experience on your college store website. Part of that is easy navigation. Many shoppers will not devote a lot of time to searching for the brand, color or size before heading to another website. Website filters help ensure customers can easily sort through your merchandise to find exactly what they want.
 College stores with the MBS system can easily set up inSite Filters to give shoppers a better overall experience. In a few simple steps, you can improve customers’ online shopping experience on your site. Today, we are going to go through the steps to set up inSite Filters. For a more detailed walkthrough, check out the Tidbit Tuesday videos on inSite Filters.
How to set up filters on your store’s inSite website
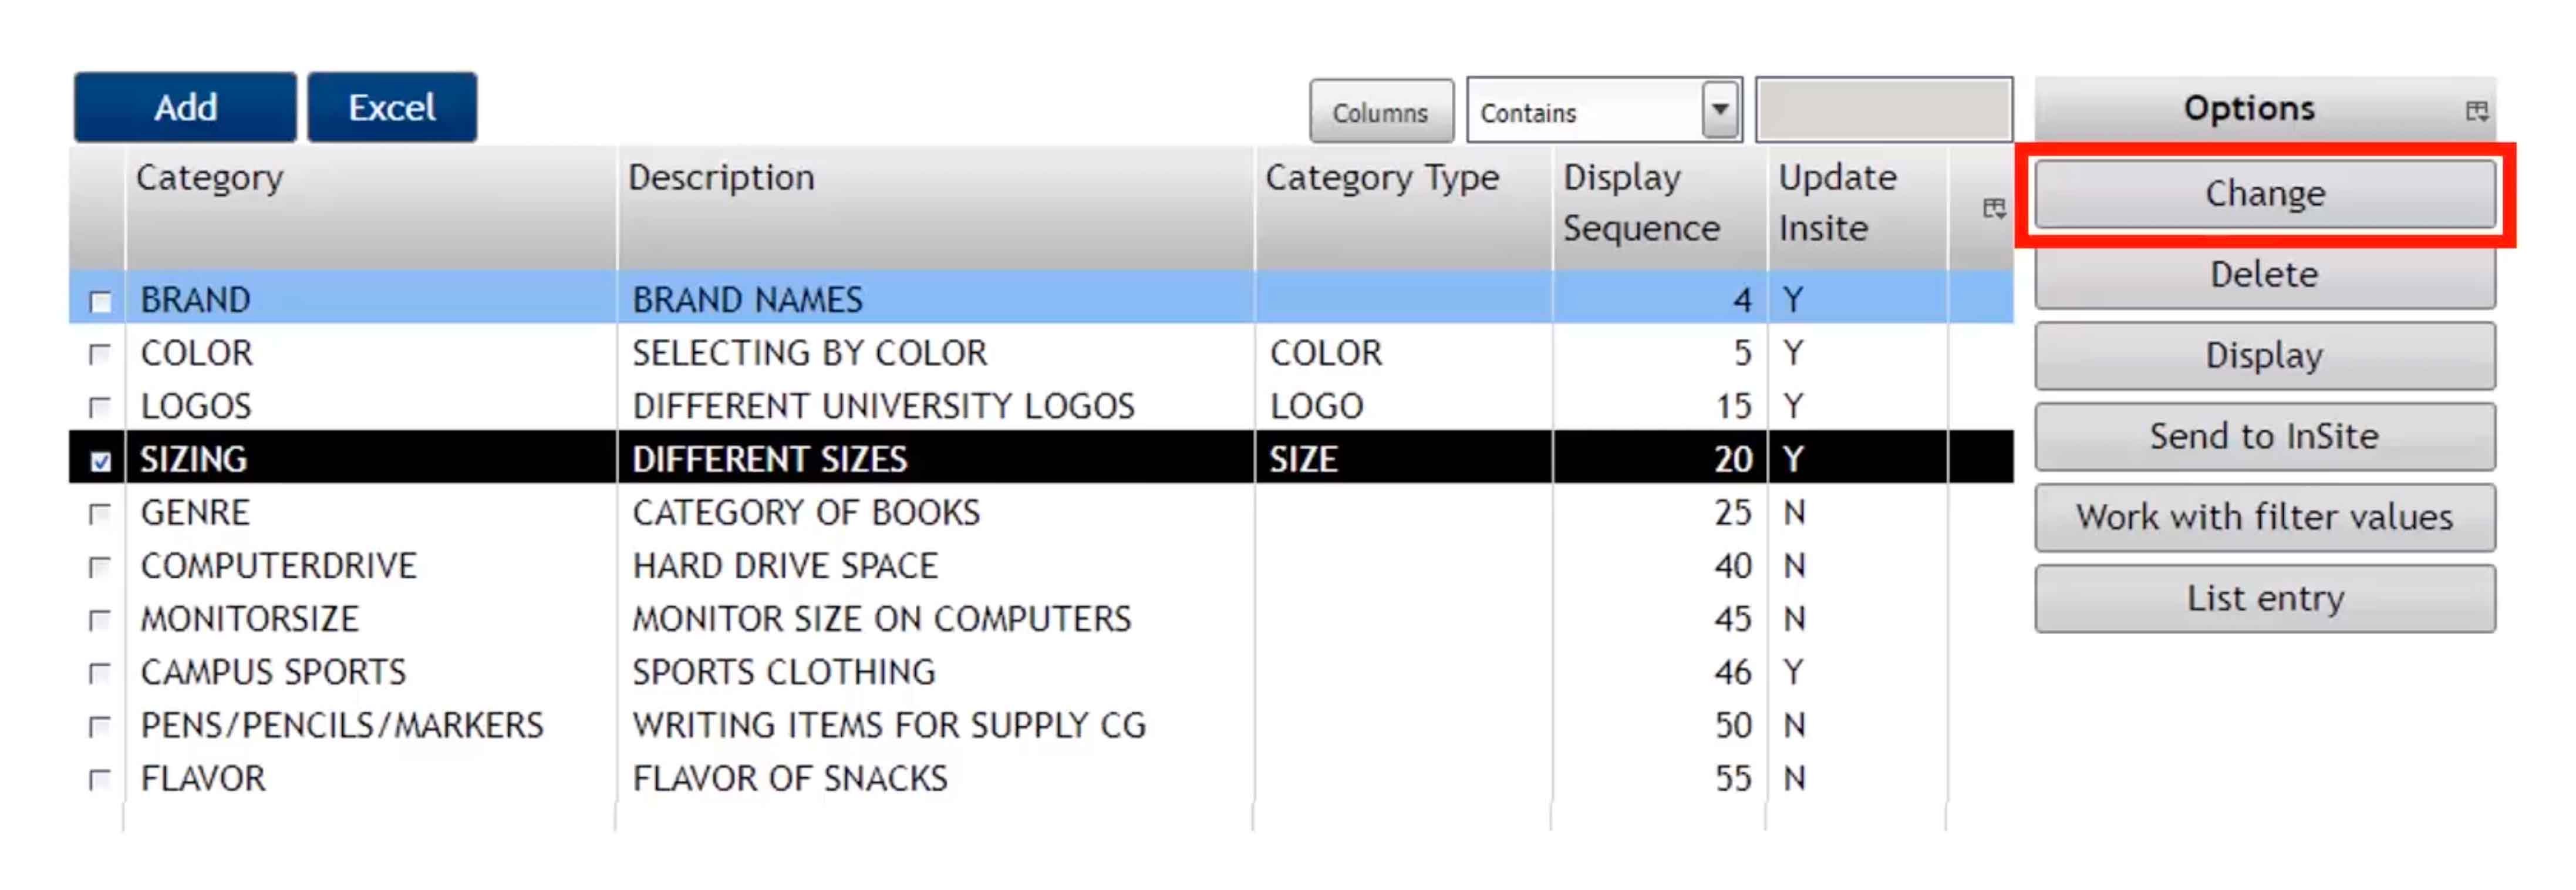
In Arc, navigate to Merchandise, Maintain Items and then Merchandise Filters. All of the proceeding steps can be taken from this screen.
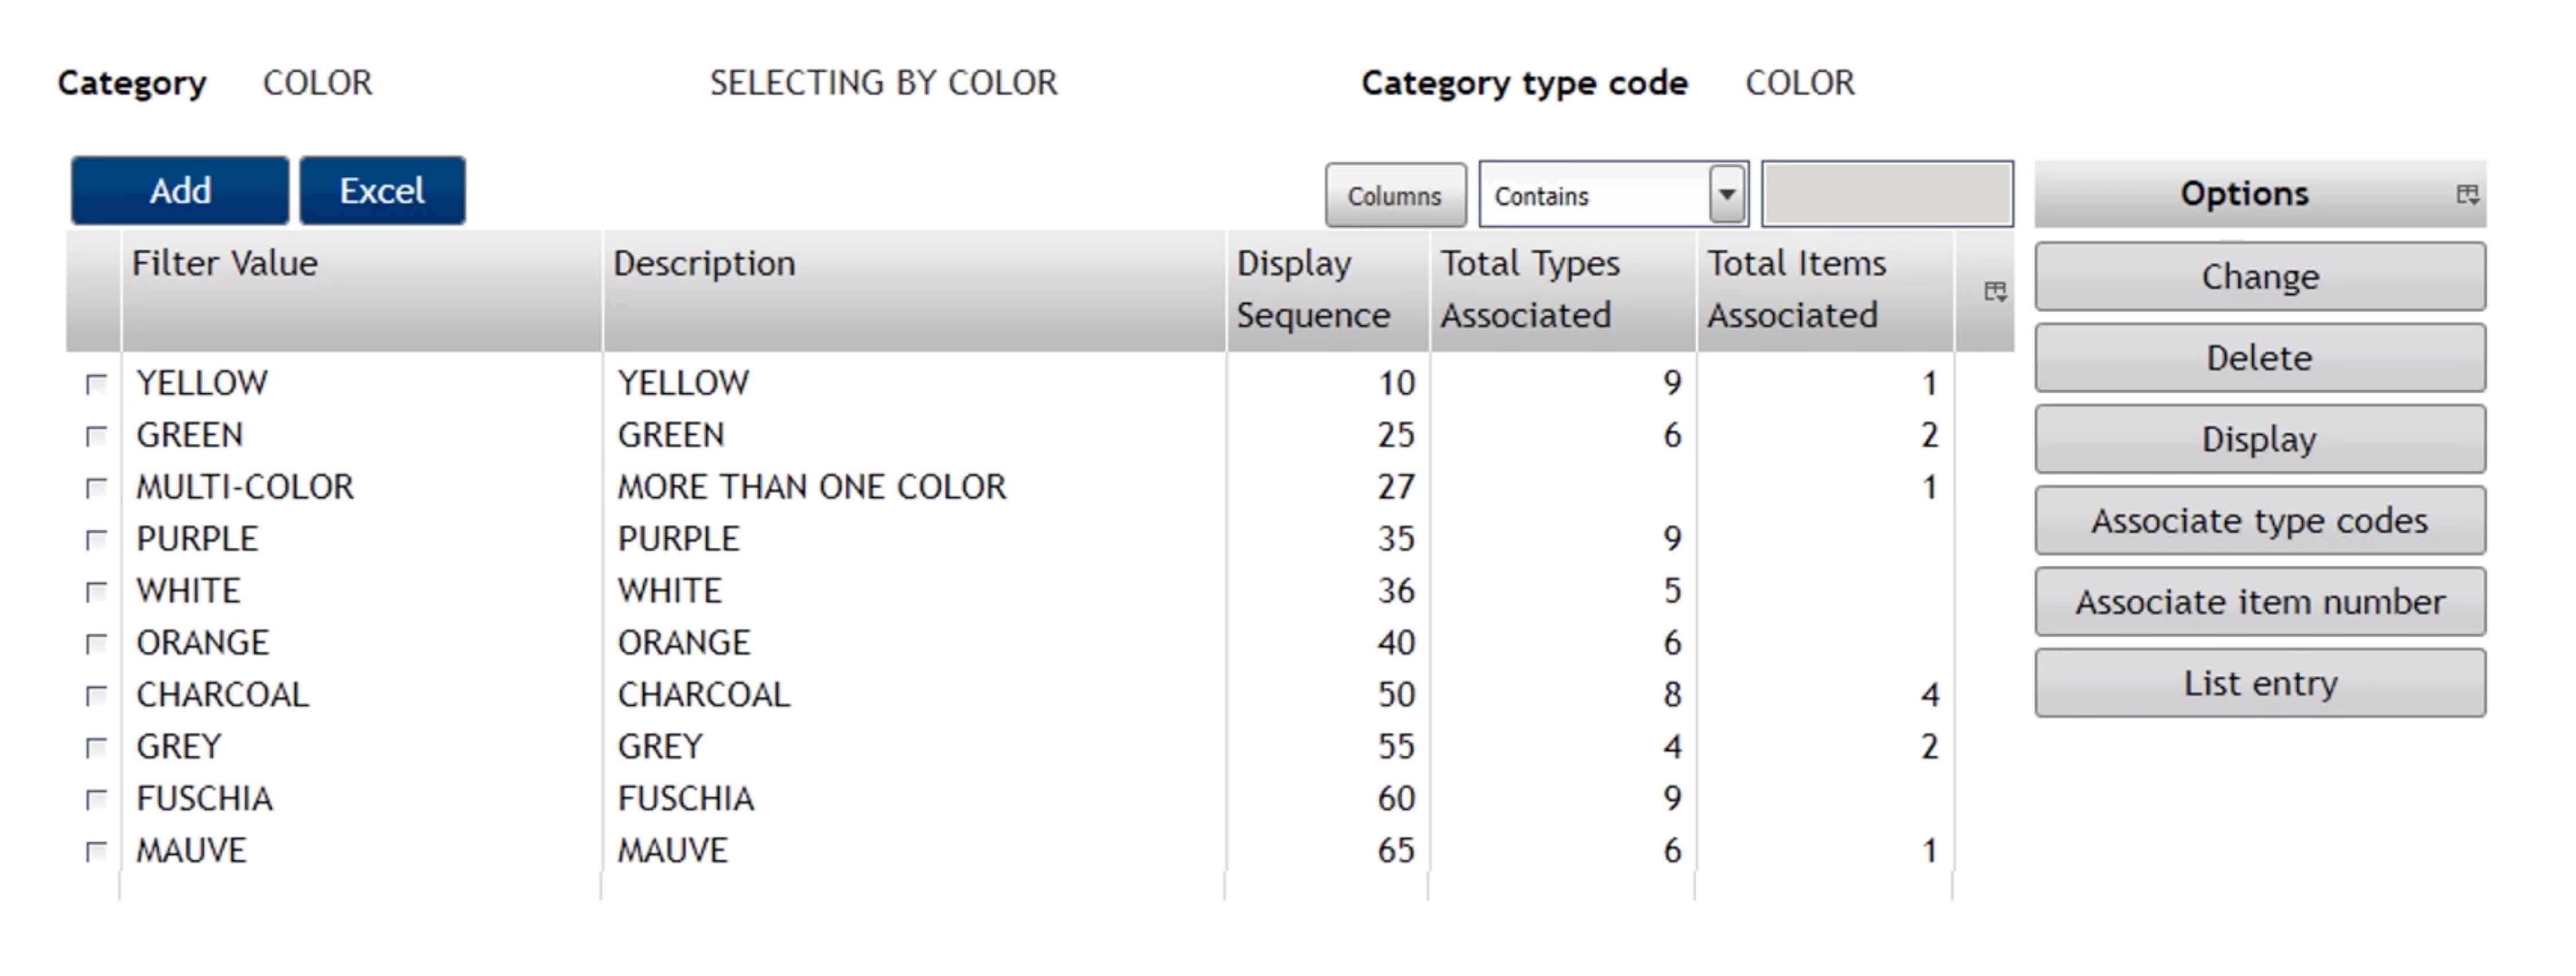
- Set up filter categories
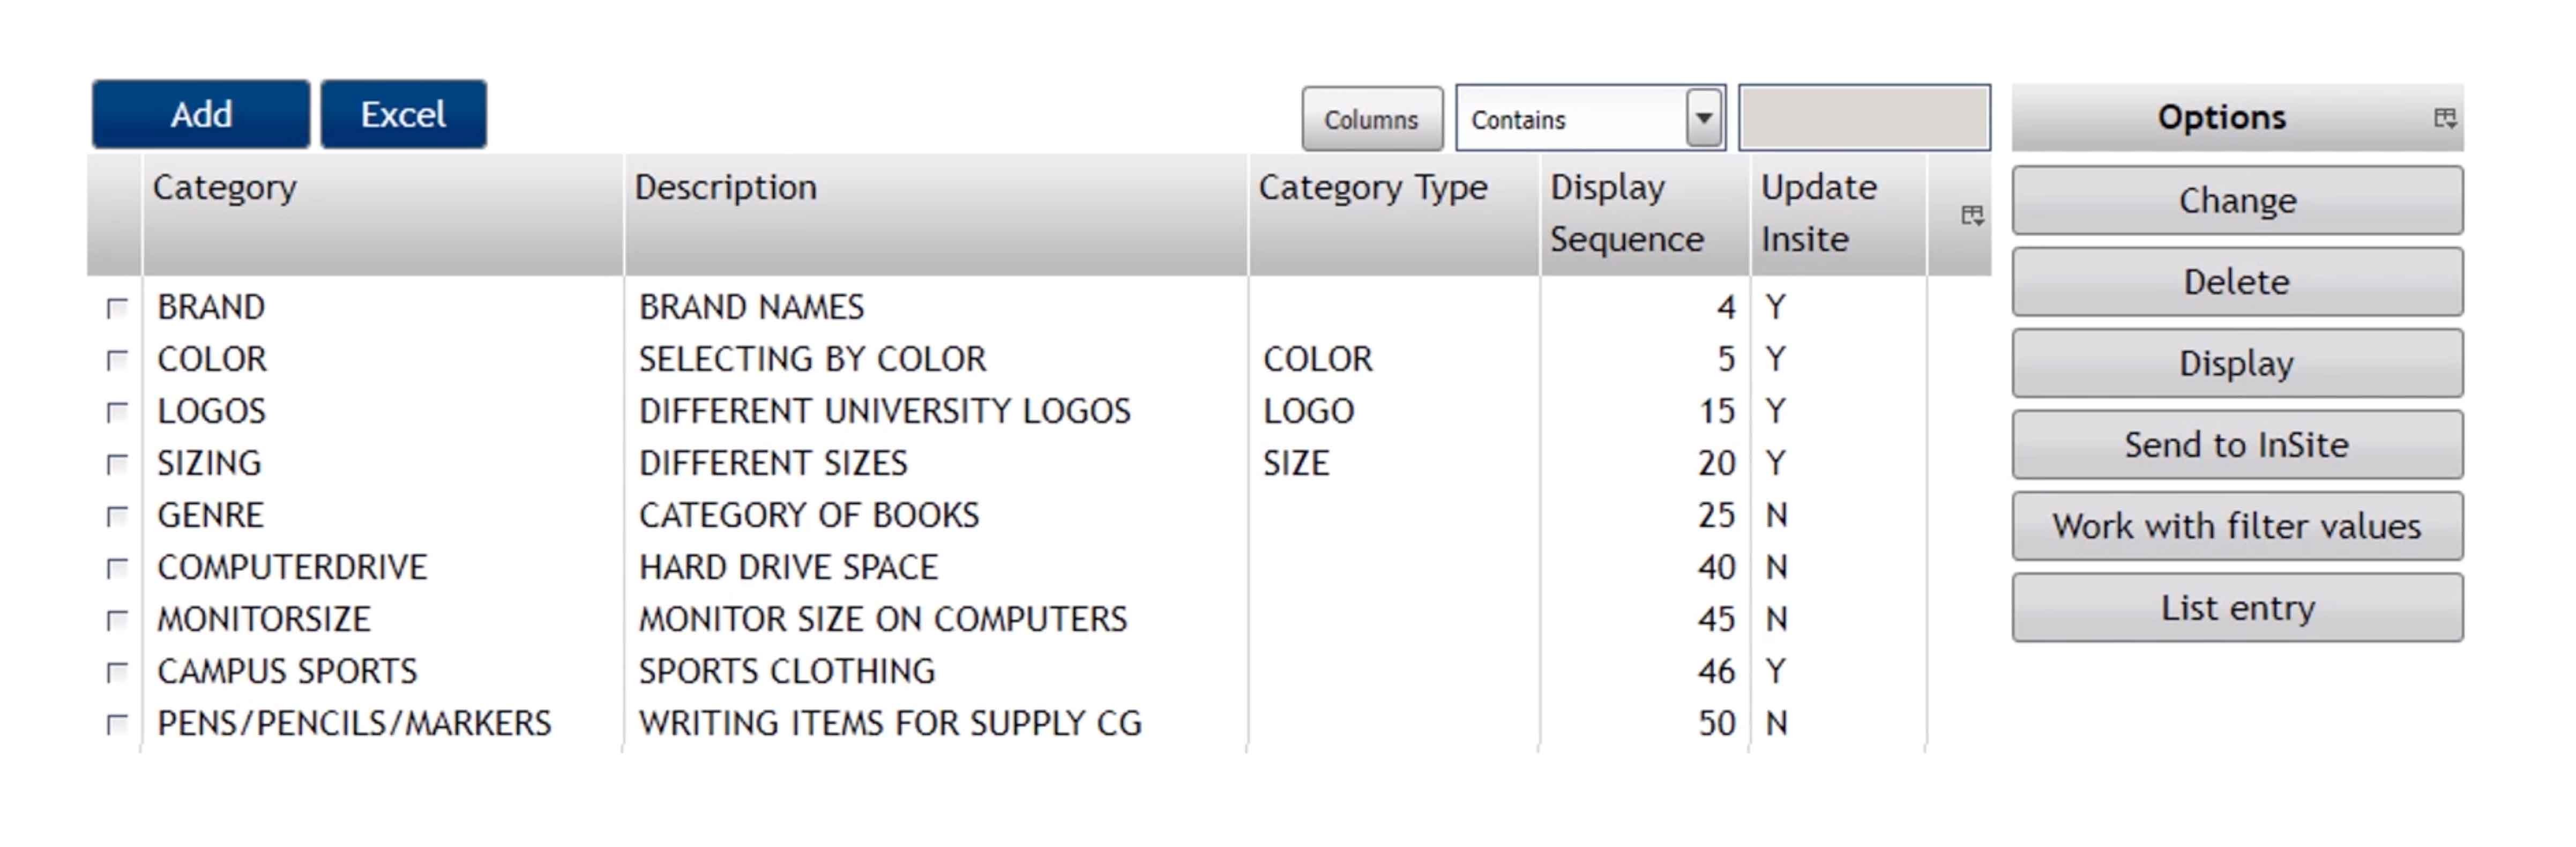
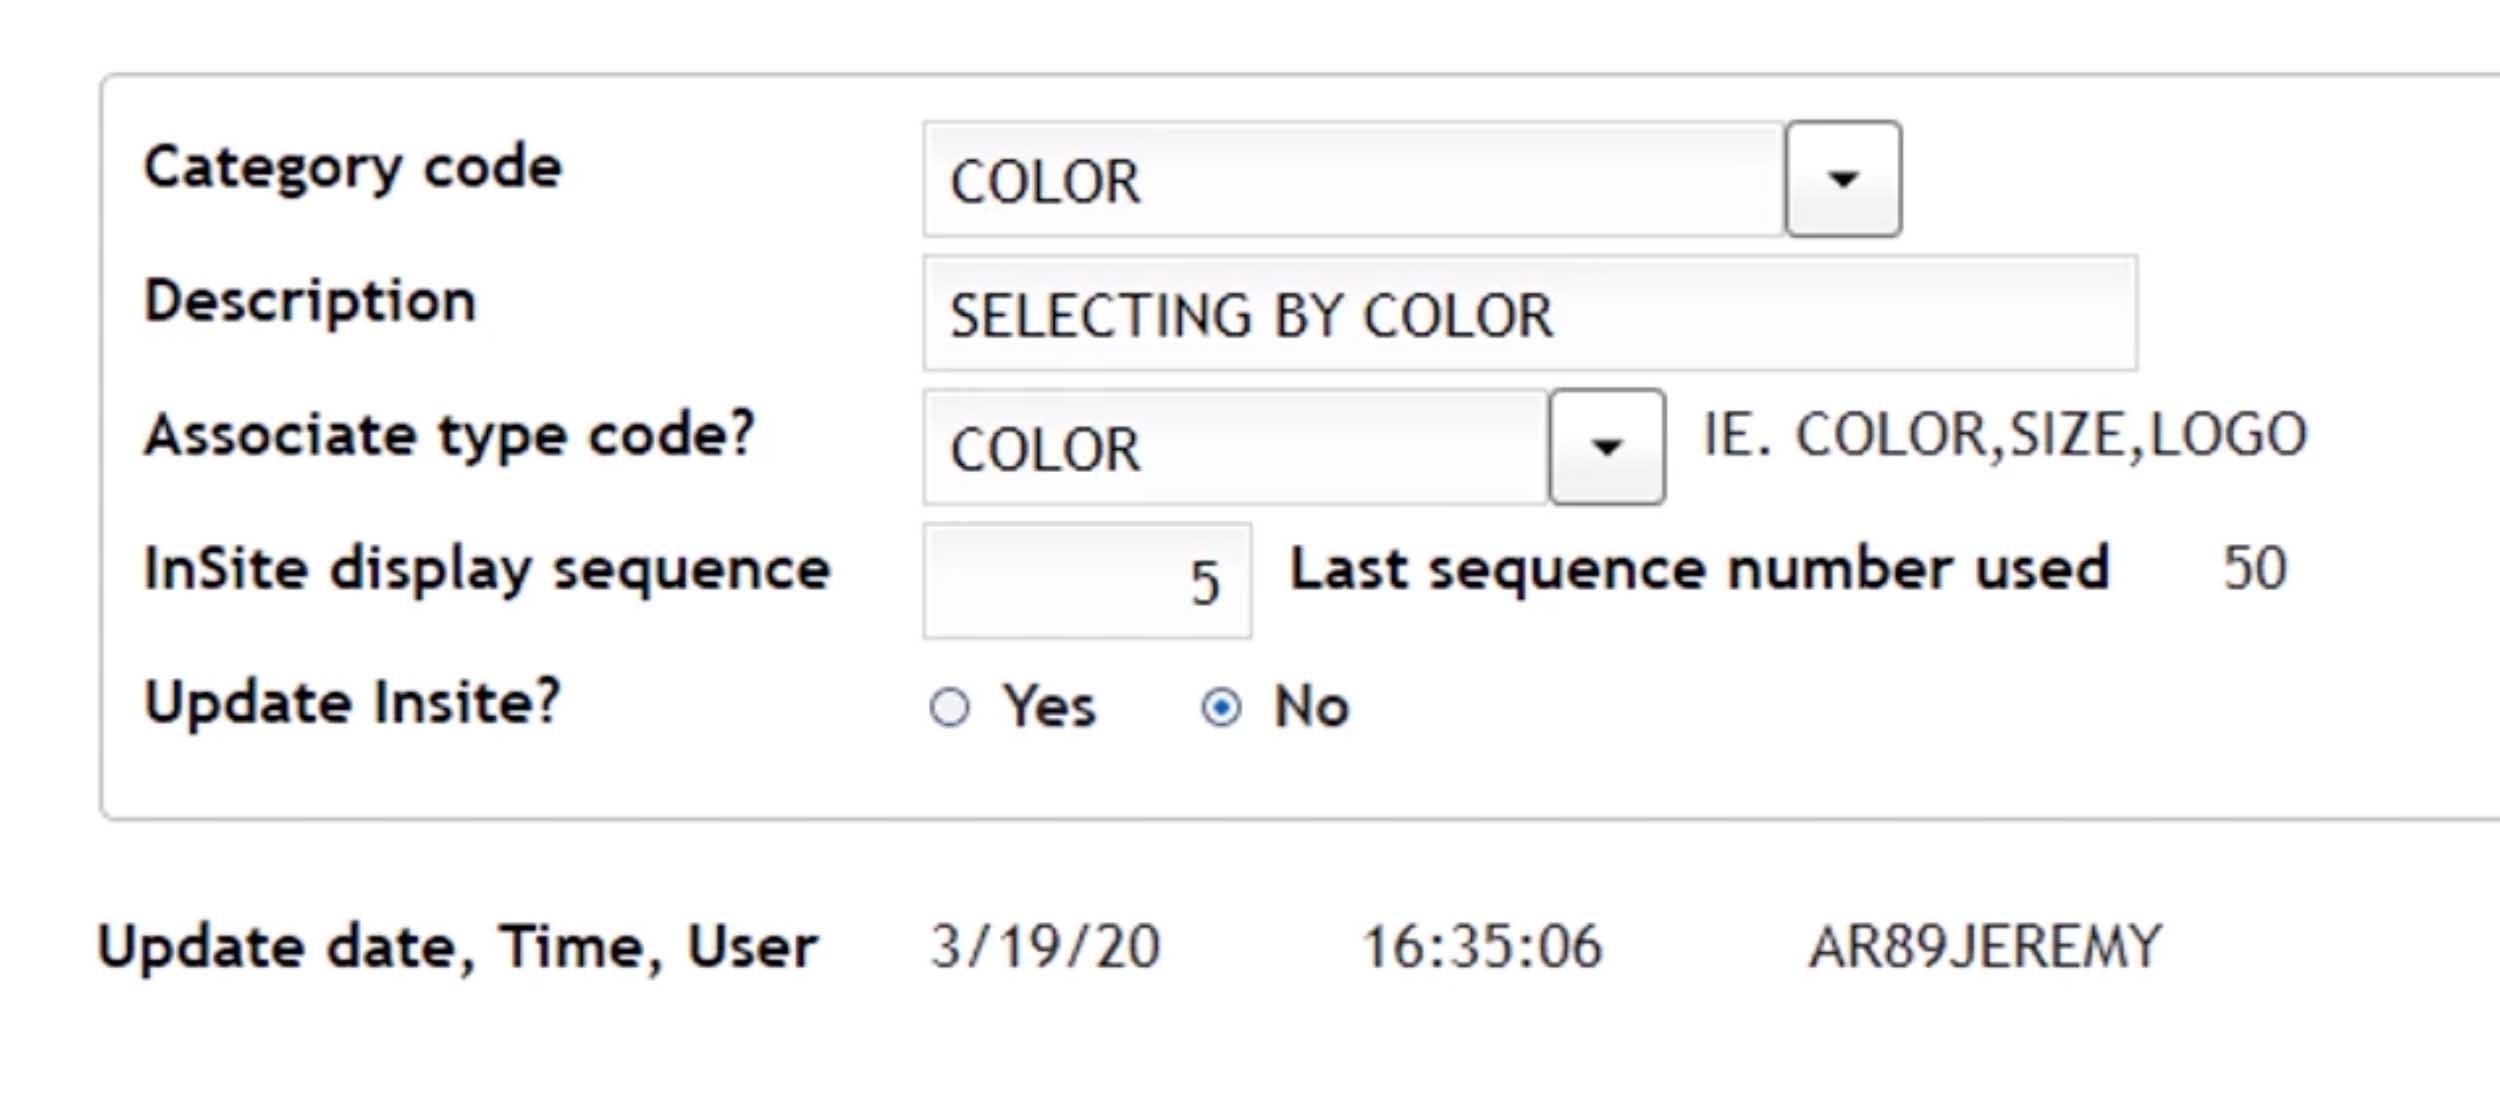
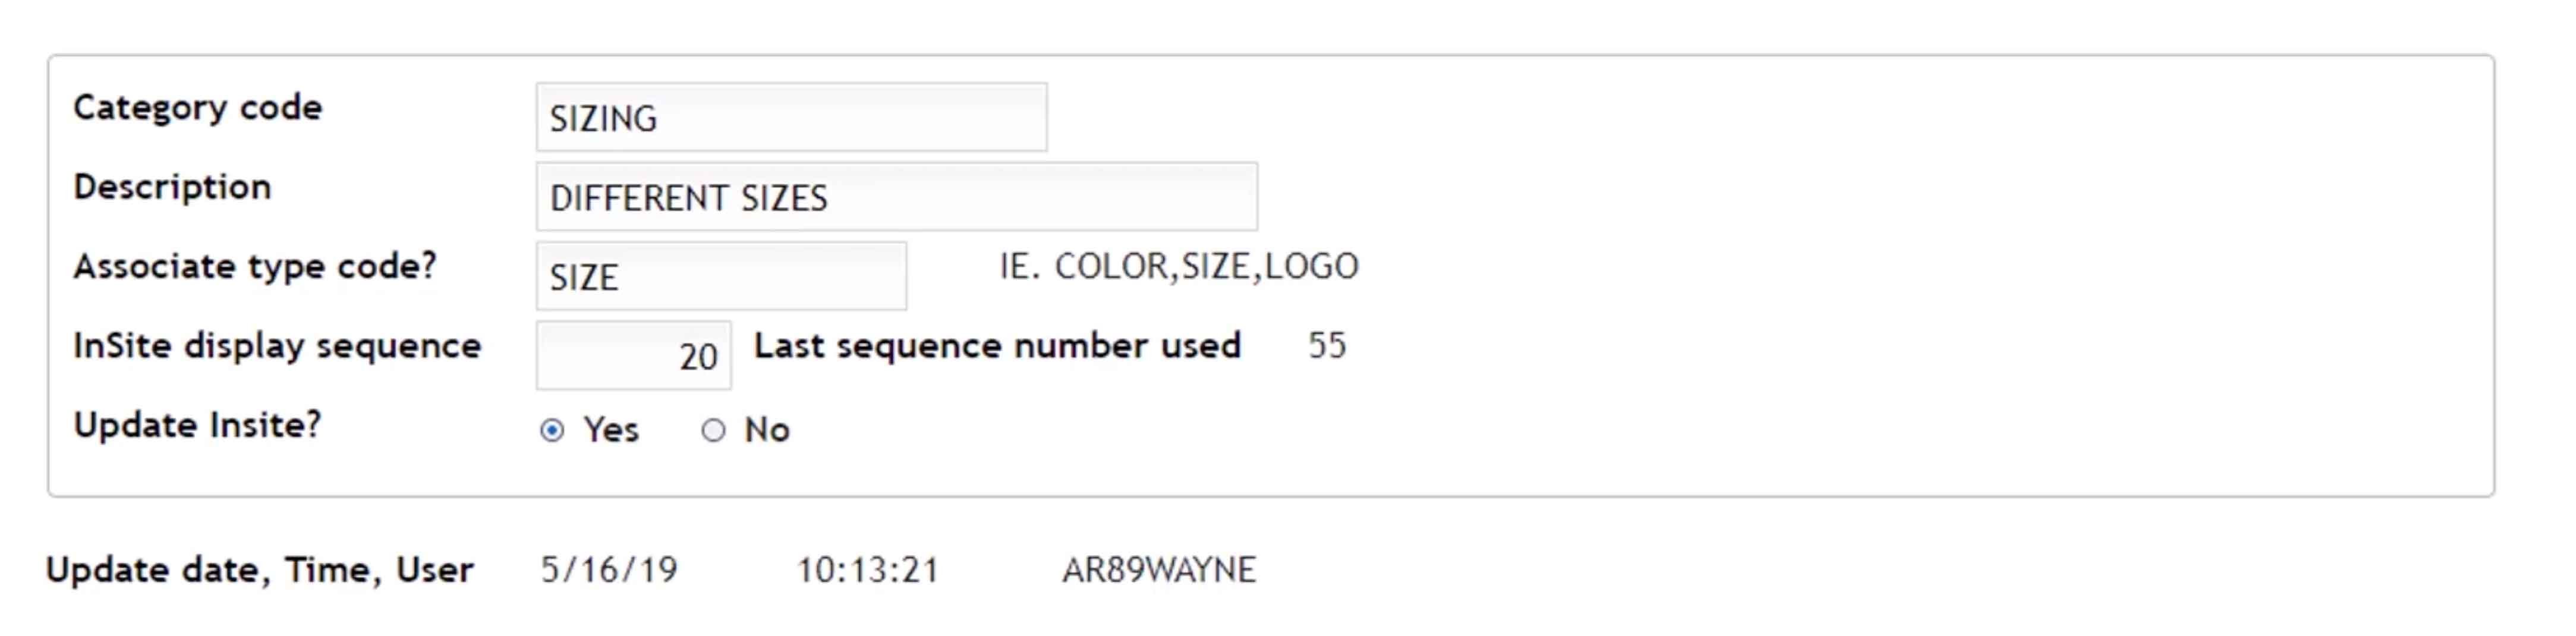
When you set up filter categories, you are creating the overall item groups that will be available to search on your site. Any category that you want to include can be created here, such as brand, logo, color, size, etc. To set up a filter category, simply:
- Select
- Fill in the category code with the name of the filter (i.e. Color).
- Add a description to provide more information about this filter.
- If you want, you can associate this filter with a specific type code.
- Choose the display sequence number for this category (i.e. the order you want the filter categories to appear on your site. If you want this filter to display first in the filtering options, you would use 1).
- Check No next to Update in inSite (You will come back and check yes, once your filters are completely set up).
- Select
- Set up filter values
Filter values are how you describe the options in the category. For example, if you are working within the color category, you might add yellow, red, blue, green, black, etc. These will become the options customers can filter by under this category. To set up values:
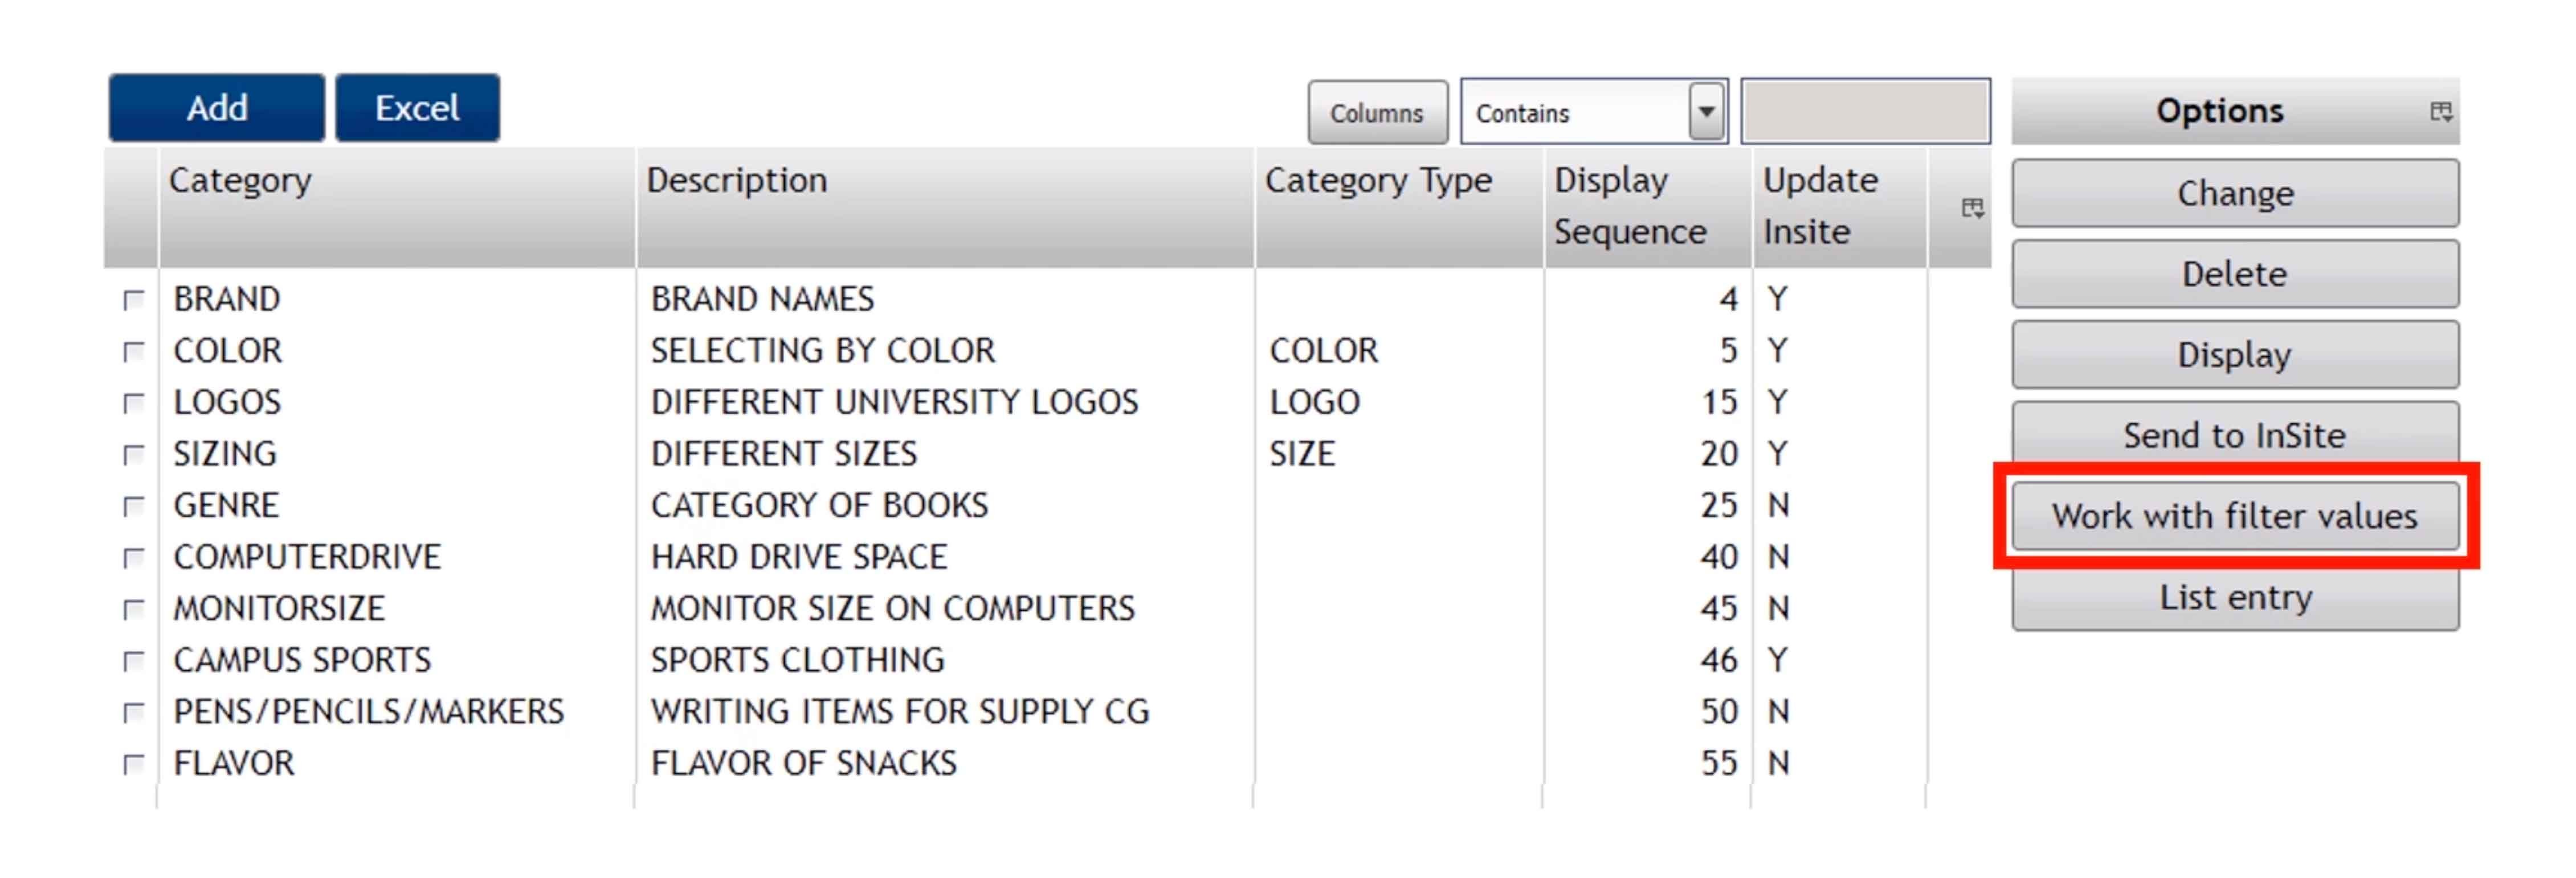
- Check the category you want to work with.
- Select Work with filter values in the column on the right.
- If this category has any existing values, they will display. To add a new value, select Add.
- Fill in the Filter Value (the word that will display, such as Blue).
- Add a description to provide more detail.
- Choose the display sequence for this value (You might want to display your school colors or most popular colors at the top).

- Check the category you want to work with.
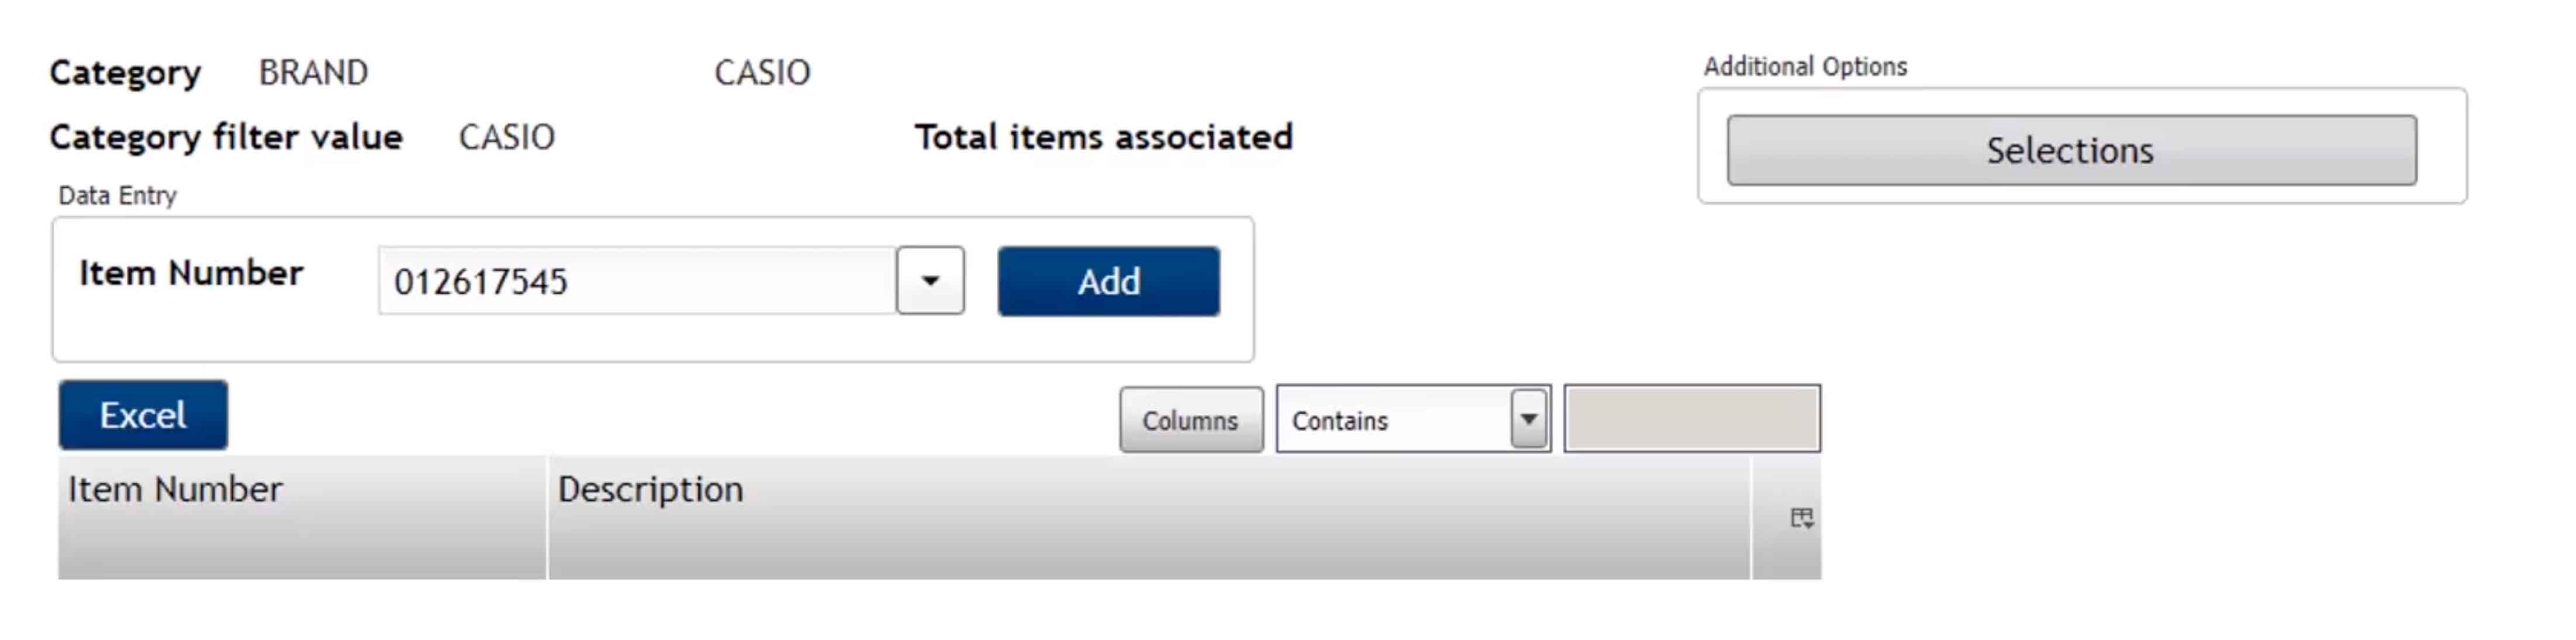
- Add items to filter values
This lets you establish the items that are relevant to the filter value. For example, every shirt may not come in orange. This would let you customize which filter values appear. To add items:
- Select the category.
- Click Work with filter values.
- Select the filter value you want to add items to.
- Select Associate Item Number. You will see any items already associated.

- Click Add.
- Enter item number and add as many item numbers as you would like.
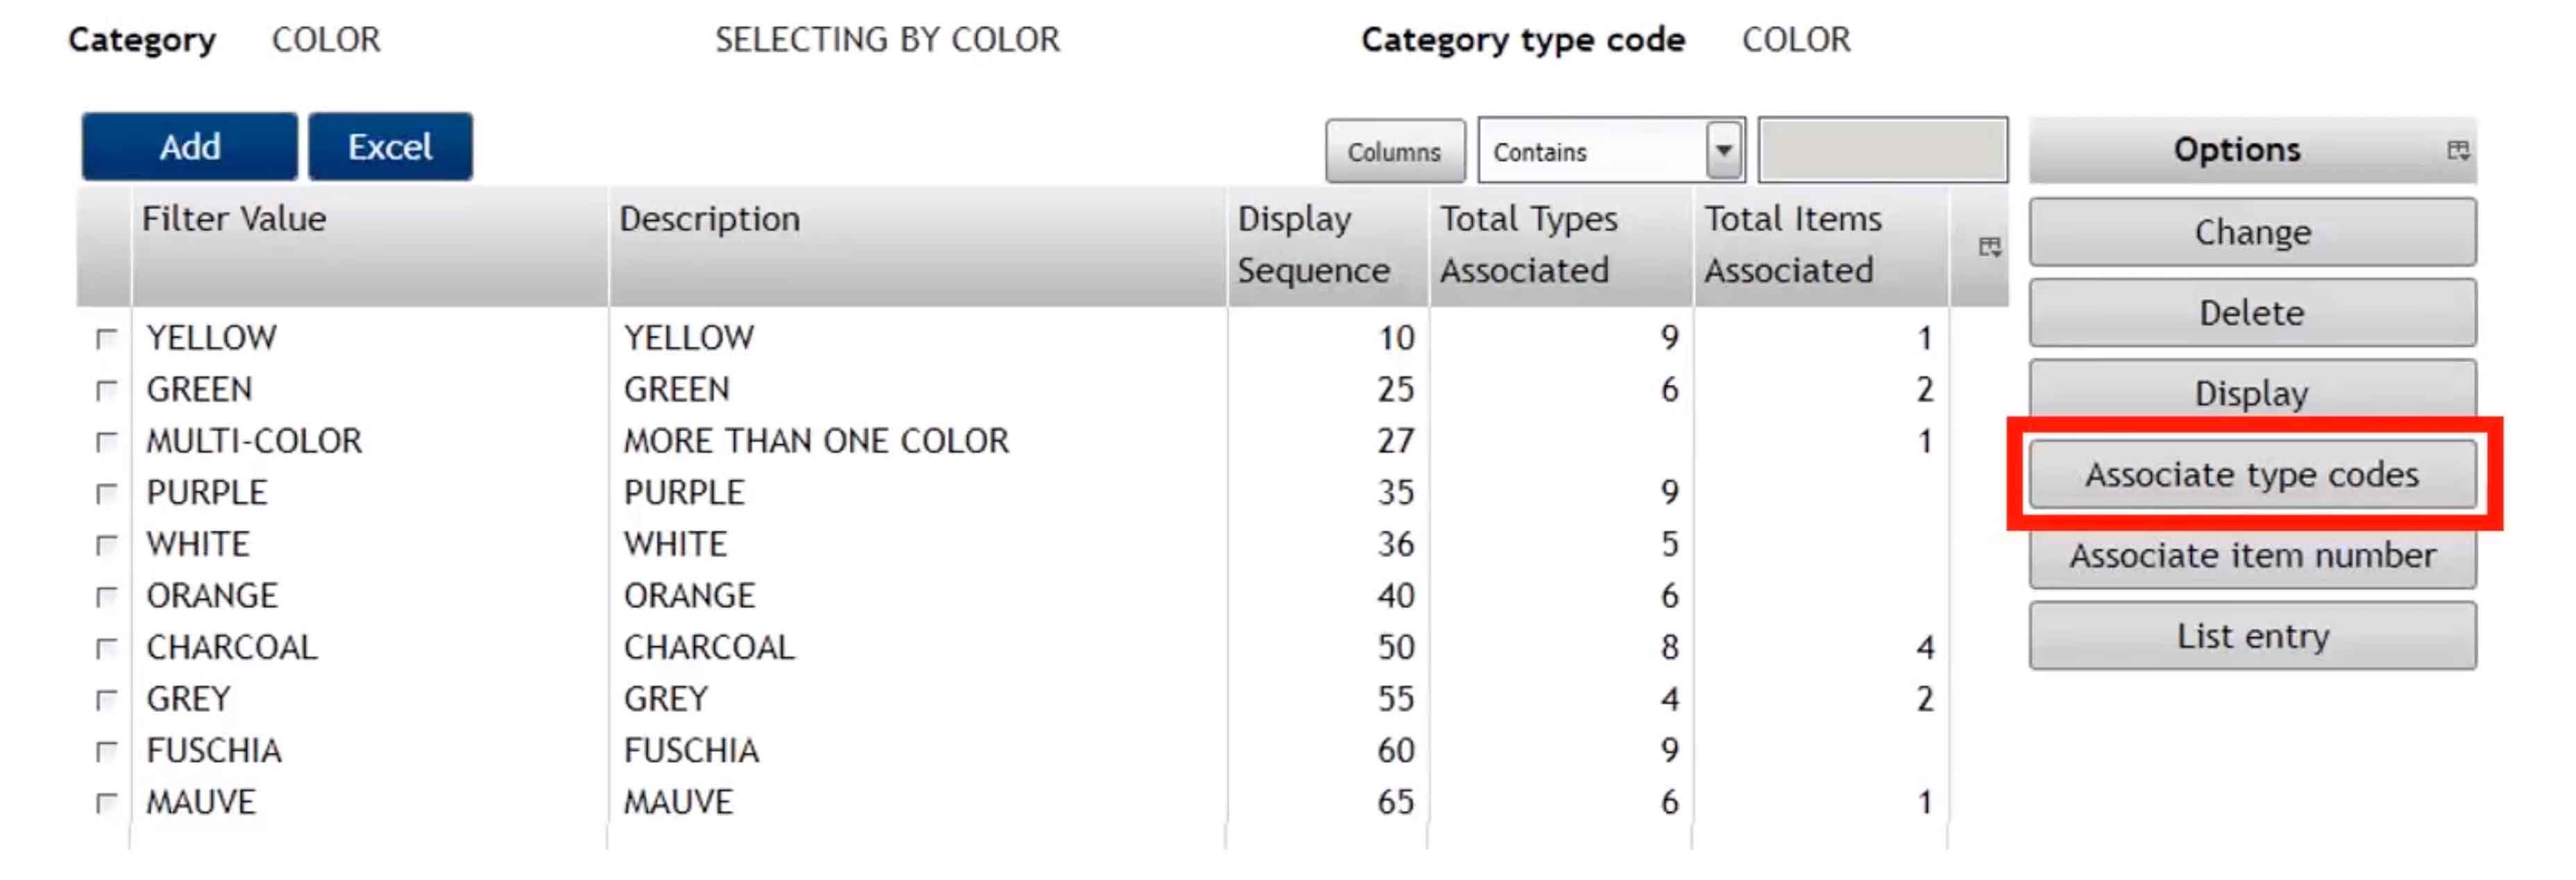
- If you want to set up a filter category using type code associations, select Associate type codes. For example, if you are working with the color filter value “Red,” you can add items already identified by red, dark red, maroon, scarlet, crimson, etc. to the filter value “Red” by adding you color codes as types codes. Then any item that has one of those color codes associated would appear when using the “Red” filter on the site.
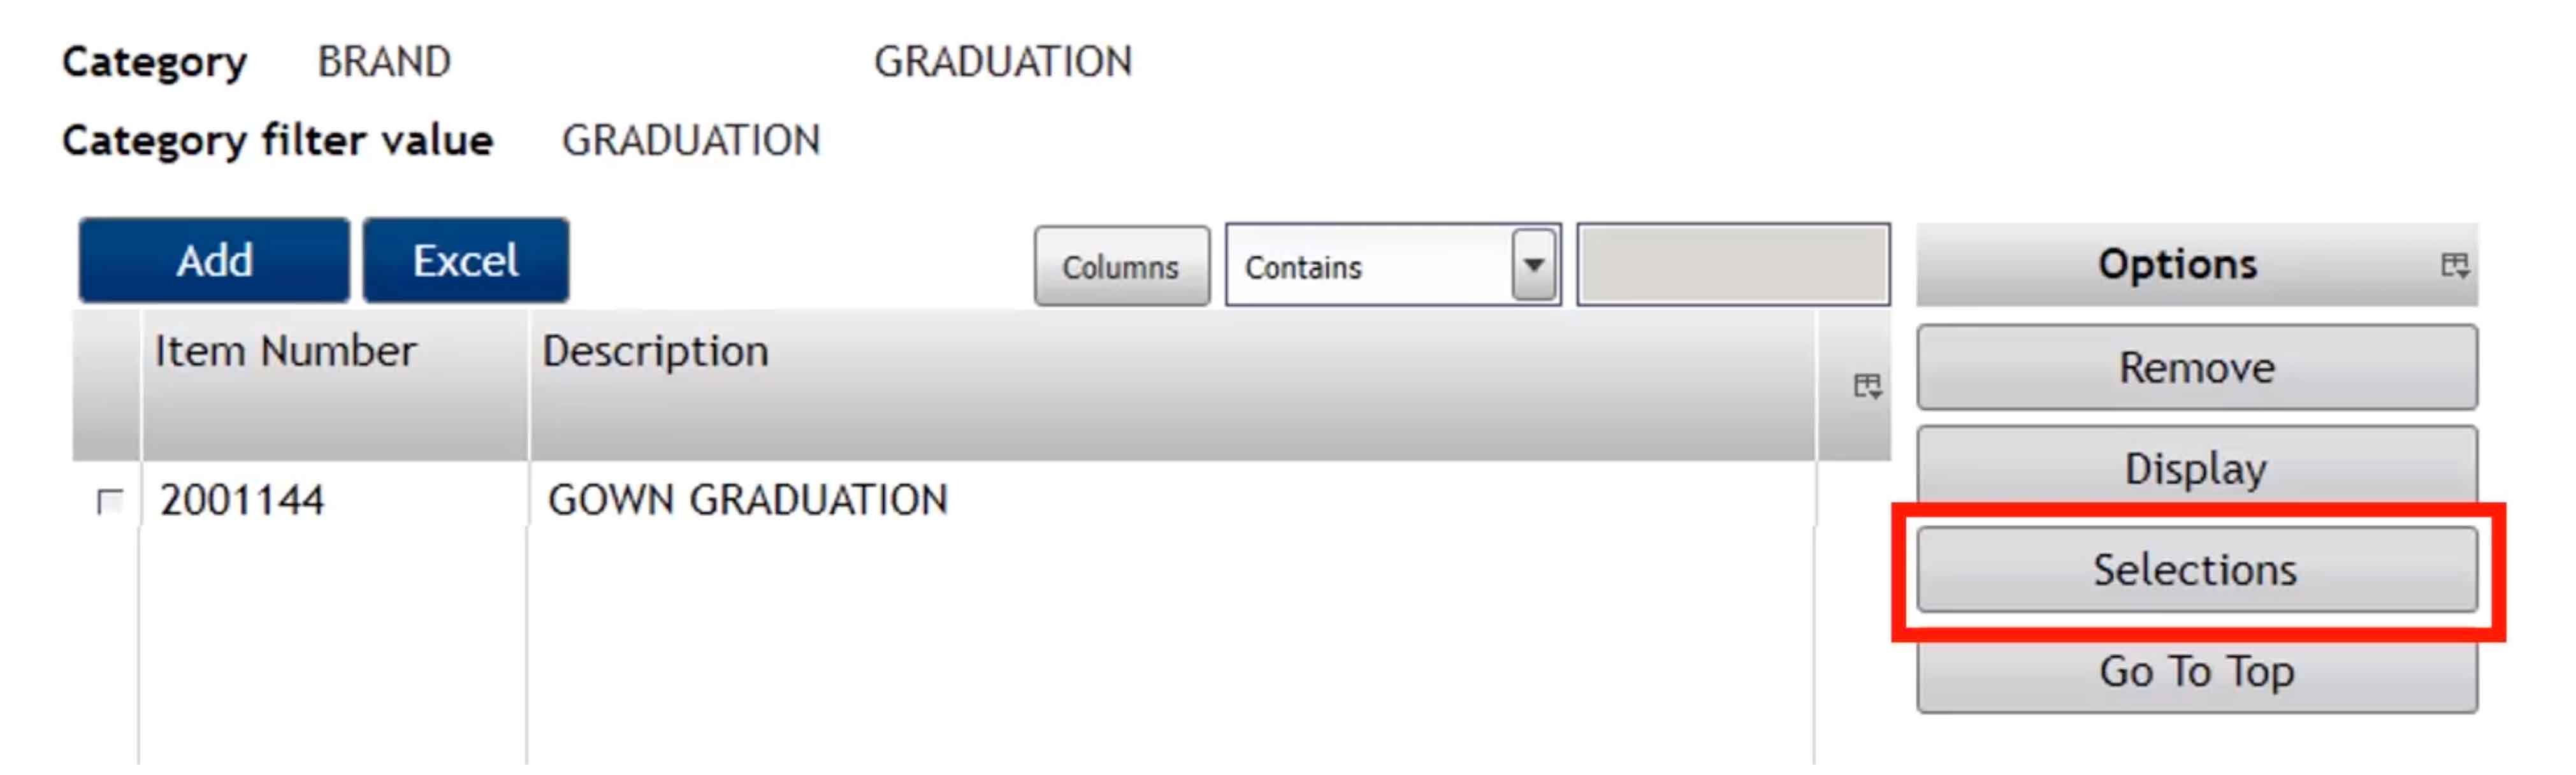
- If you want to add a group of items, you can under Selections. Simply add a class, vendor, season code, etc. Select the items you want to add and click Save.
- Select the category.
- Send filters to inSite
This is the final step. Once you have the filters set up and ready to go:
- Change No to Yes on the filter categories next to Update in inSite.
- Select all the categories you have updated.
- Click Send to inSite.
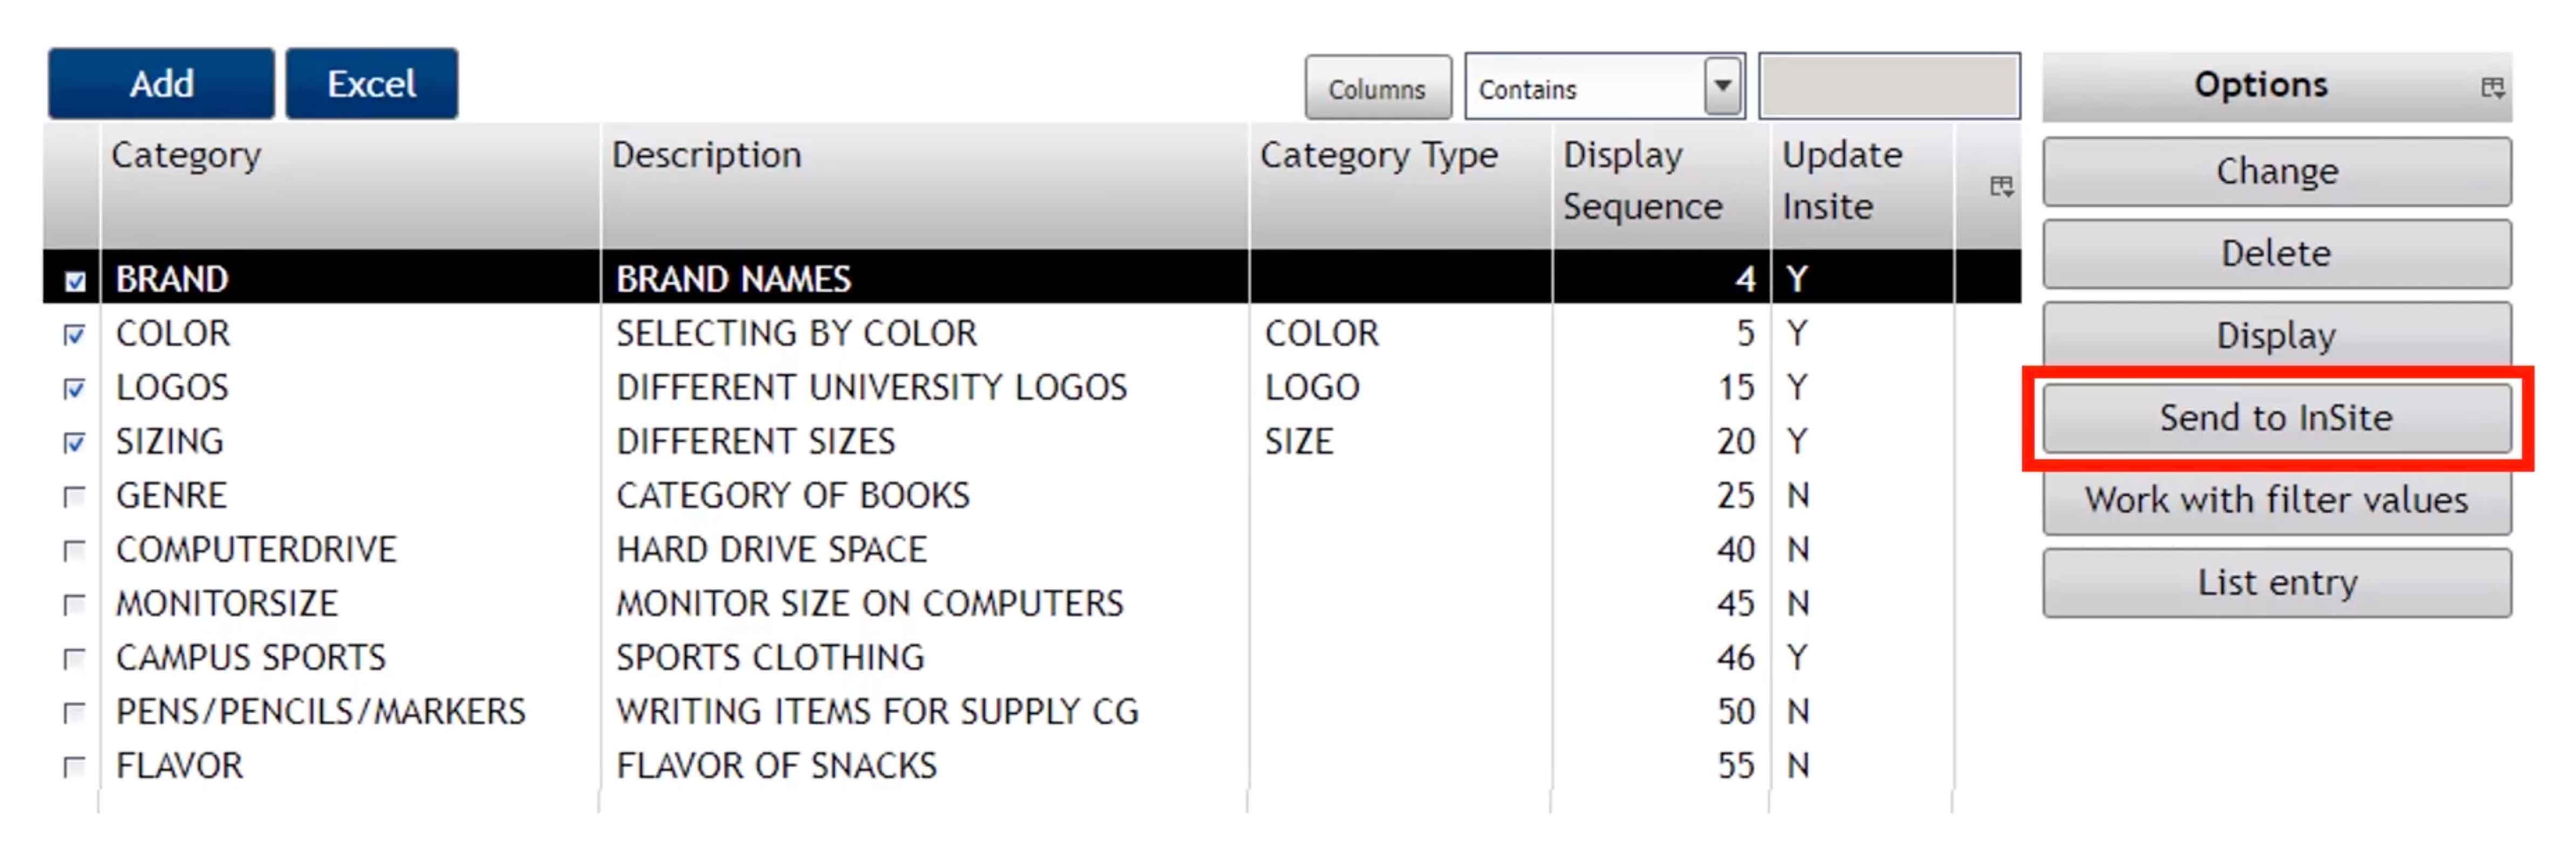
- Change No to Yes on the filter categories next to Update in inSite.
Within a few minutes, the filter options will be available on your website. You can easily update your filters as necessary and keep your website fresh and easy for students to use.